Destroying Other PC Ports
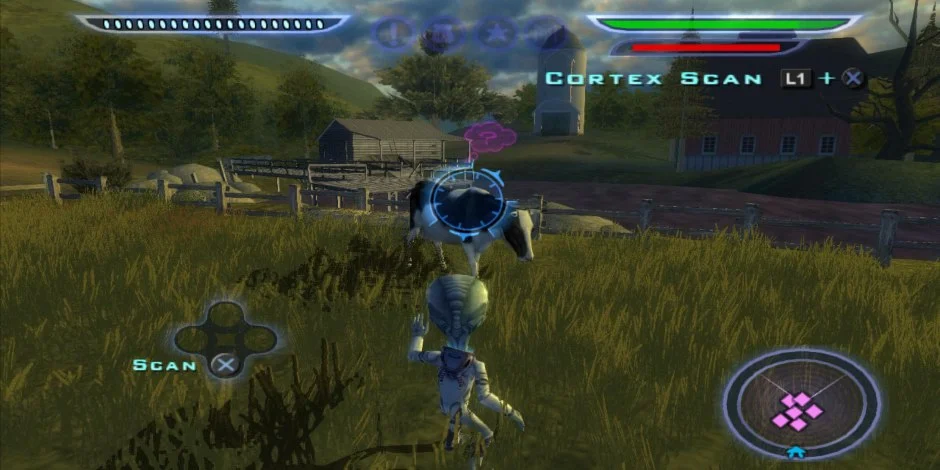
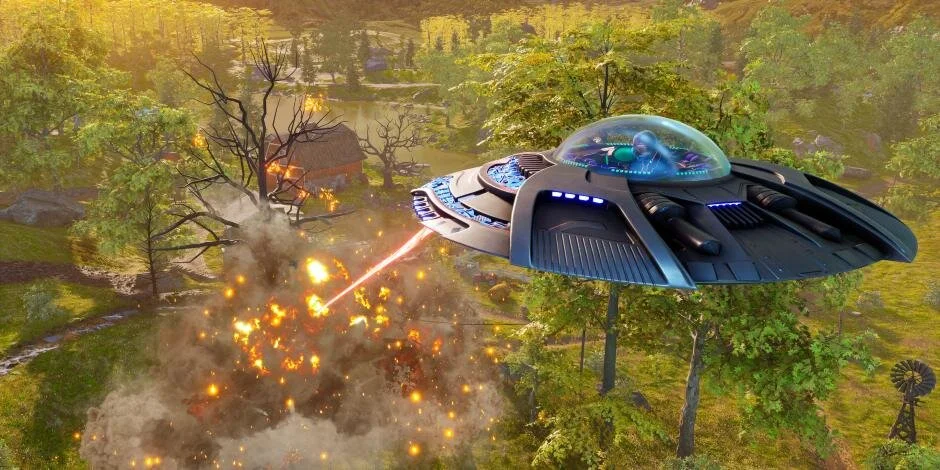
While there have been several solid PC Ports and remakes as of late, DESTROY ALL HUMANS! makes an exceptional outing for it’s 2020 remake. Graphic options are abundant, performance is buttery smooth and best of all, it’s just the politically incorrect, fun and totally outrageous type of entertainment we need during these insane times.
With everything on ULTRA except Anti Aliasing (see tweaks below), Humans runs like a dream and while the game isn’t the most impressive title to show off your rig, the new graphics overhaul is clean, beautiful and more than functional. Tearing apart a country fair never looked and felt so good! The game is available now on Steam and is currently sitting at an Overwhelmingly Positive score.
Tweaks
Not being able to disable the TAA anti aliasing in game is a bit of a bummer but a small blemish on an otherwise impressive package. Since the game runs on Unreal 4, there are several tweaks that can be adjusted to get the game to your liking. Props to Doctor Hades on the Steam boards for help on this:
1. Go to the (hidden) Users > [Username] > AppData > Local > DH > Saved > Config > WindowsNoEditor folder where the Engine.ini file is located. The Users folder is usually located on the C: drive where Windows is installed.
2. Backup the Engine.ini file so you can restore if you prefer (or you can delete the edited file and the game should recreate it).
3. Edit the Engine.ini file using Notepad, Notepad++ or similar and add the following text after the [Audio] UnfocusedVolumeMultiplier=1.000000 entry:
[SystemSettings]
foliage.LODDistanceScale=5
r.AmbientOcclusionRadiusScale=1.5
r.MaxAnisotropy=16
r.ScreenPercentage=100
r.Shadow.DistanceScale=5
r.SkeletalMeshLODBias=-2
r.StaticMeshLODDistanceScale=0.25
r.TemporalAACurrentFrameWeight=0.2
r.TemporalAASamples=64
r.Tonemapper.Sharpen=1
r.Upscale.Quality=3
r.ViewDistanceScale=5
The file should then look like this:
[Core.System]
Paths=../../../Engine/Content
Paths=%GAMEDIR%Content
Paths=../../../Engine/Plugins/FX/Niagara/Content
Paths=../../../Engine/Plugins/Editor/BlueprintMaterialTextureNodes/Content
Paths=../../../Engine/Plugins/Experimental/ControlRig/Content
Paths=../../../Engine/Plugins/Runtime/SoundUtilities/Content
Paths=../../../Engine/Plugins/Runtime/Synthesis/Content
Paths=../../../Engine/Plugins/Experimental/PythonScriptPlugin/Content
Paths=../../../Engine/Plugins/2D/Paper2D/Content
Paths=../../../DH/Plugins/GameWorks/Blast/Content
Paths=../../../DH/Plugins/GenericGraph/Content
Paths=../../../DH/Plugins/BFGSessionFrontend/Content
Paths=../../../Engine/Plugins/Developer/AnimationSharing/Content
Paths=../../../DH/Plugins/discordrpc/Content
Paths=../../../Engine/Plugins/Editor/CryptoKeys/Content
Paths=../../../Engine/Plugins/Enterprise/DatasmithContent/Content
Paths=../../../Engine/Plugins/Media/MediaCompositing/Content
Paths=../../../Engine/Plugins/Runtime/Oculus/OculusVR/Content
Paths=../../../Engine/Plugins/Runtime/Steam/SteamVR/Content
[Audio]
UnfocusedVolumeMultiplier=1.000000
[SystemSettings]
foliage.LODDistanceScale=5
r.AmbientOcclusionRadiusScale=1.5
r.MaxAnisotropy=16
r.ScreenPercentage=100
r.Shadow.DistanceScale=5
r.SkeletalMeshLODBias=-2
r.StaticMeshLODDistanceScale=0.25
r.TemporalAACurrentFrameWeight=0.2
r.TemporalAASamples=64
r.Tonemapper.Sharpen=1
r.Upscale.Quality=3
r.ViewDistanceScale=5
5. Save the file and load the game to enjoy improved visuals at the cost of some performance.
On my GTX 1080 Ti at 2560x1440 I get over 60 fps. You can reduce the r.XXXXXX.Scale settings from 5 to 2 if you want extra performance at the cost of a reduced draw distance (the default setting for these is, I believe, 1).
If you want to remove any settings so the game uses its default that just precede the setting with a hash (#) like this:
[SystemSettings]
foliage.LODDistanceScale=5
#r.AmbientOcclusionRadiusScale=1.5
r.MaxAnisotropy=16
#r.ScreenPercentage=100
r.Shadow.DistanceScale=5
r.SkeletalMeshLODBias=-2
r.StaticMeshLODDistanceScale=0.25
r.TemporalAACurrentFrameWeight=0.2
r.TemporalAASamples=64
r.Tonemapper.Sharpen=1
#r.Upscale.Quality=3
r.ViewDistanceScale=5
If you want to super sample the game (i.e. run it above the native resolution you are using) the increase the r.ScreenPercentage setting above 100, e.g.
r.ScreenPercentage=125
This increases the rendering resolution of the game to 3200x1800 at my 2560x1440 resolution.
r.ScreenPercentage=150
This increases the rendering resolution of the game to 3840x2160 at my 2560x1440 resolution, though on the settings I am using it does mean the framerate can dip below 60 fps, which even on my G-SYNC display is noticeable.
Likewise you can *reduce* this figure below 100 to gain extra performance while keeping the HUD and text at native resolution, e.g.
r.ScreenPercentage=90
This will render the game at 90% of the resolution you have selected which at 2560x1440 would be 2304x1296. The HUD and overlays would still be rendered at 2560x1440 so the you can use this if you need extra performance but without blurring the interface etc.
r.TemporalAASamples=64
This gives maximum quality temporal anti-aliasing (the default setting is 8, I think). You can lower this to 32, 16, 8 or 4 for lesser quality AA.
r.Tonemapper.Sharpen=1
This offsets the added blur that using TAA introduces. You can set this to 0 or put a hash (#) if front of the setting if you want to use the game's default setting, which I believe will be 0.